Last weekend, I went with my friend Liz to the Cake and Bake Show in Manchester and we had a great time. I booked into a bread workshop with Patrick Ryan of the Bread Revolution. It is amazing how much you can learn in 35 minutes. What follows is my attempt to show you how to make 3 breads using what I learned in the workshop.
Making a Poolish ( a fermentation starter)
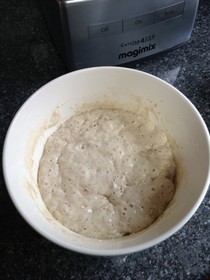
Mix 250g of strong bread flour, 250ml water and 3g of dried yeast (5g if its fresh yeast). leave overnight. It will look like this the next day:
Making the bread dough
In a large bowl, put 1kg of strong bread flour and mix in 15g salt. It is important of mix the salt through so that it doesn’t react with the yeast.
Add in your Poolish and spike the mix with an extra 3g dried yeast ( or 5g if fresh yeast).
Add 600ml cold water ( cold water slows the yeast down so that it proves for longer and improves the flavour)
Mix in the bowl with a dough scraper until you have a rough dough
Then tip it out onto the table and knead.
Kneading
One thing that surprised me to learn was that you don’t need to knead for a long time! A little trick I learnt was that you can knead for 30 seconds leave it to rest then repeat three times and you still get a good bread. This was a complete revelation to me and a relief!!
After the first knead let it rest for the ten minutes, whilst you think about flavours.
Flavouring
For my three breads I did the following flavours:
Wild garlic pesto bread ( using my pesto recipe from the blog. Wild garlic is only in season for a short time and now is that time!)
Malted grains bread: (using a pack of malted grains I bought from Flour Bin, a fantastic stall at the show. http://www.flourbin.com/ I also bought some malt flour from them so watch this space for more bread recipes)
Toasted seeds bread: I used linseed ( from Flour Bin), sesame seeds, fennel seeds, coriander seeds and cumin seeds and toasted them in a dry frying pan. I then added a splash of soy sauce. This was a great tip from Patrick Ryan and gave the mix a great flavour.
More kneading and resting then proving
Split the dough into three, mix your flavours in to your three bread doughs, knead and rest again for 10 minutes.
Knead again and then leave the bread to prove for at least an hour thought it may take longer depending on the heat of the room.
Shaping and second prove
After the first prove knock the dough back then shape the bread.
I did three different shapes
A baguette style: I folded up the dough long ways then lined a long loaf tin with a tea towel dusted with flour and placed the dough in it for its second prove.
A swirl shape (there’s probably a better name!): make the dough into a LNG baguette shape, rest for a minute then roll up the dough one way at one end and opposite way at the other end ( it should Look a bit like two Danish swirls!)
A crown ( though I need to practice this a lot more): place a small bowl in the centre of your proving basket and rub it with a little oil. Divide your dough into 7. Roll out one of the pieces into a circle and place it over the small bowl. Roll up the other pieces into balls and place them around the bowl. Cut triangles from the circle and food over each ball and leave to prove.
Baking
Once the dough has proved a second time, put the breads on a baking tray and bake for approximately 30 minutes at 210c. Pour a jug of water into a tray at the bottom of the oven to create steam.
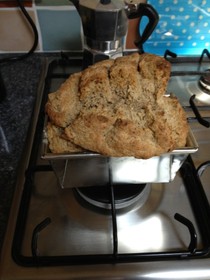
And….here is the result….
Still room for improvement but Patrcik Ryan said in reply to my tweet that it was ‘pretty impressive for your first go’ and my husband loved the bread. I’ll take that!
– Posted using BlogPress from my iPad


